Static Discrete parameters are used when the user needs to pick something from a definitive list of items. They can be used for driving both text and numeric selections throughout the application - including formulas, logic and lists. They can also be global in scope, or attached to a specific data model.
Creating a Discrete Parameter
After selecting the parameter's scope (model or global), you need to choose its type: Number or Text. For both types, you can choose the element mechanism (red arrow) - which is where we specify the parameter to be 'discrete'.
In the table below, provide the specific items or values that will be used in your discrete listing. Each item needs to be given a caption and value. Use the plus sign (green arrow below), to add another blank item row.
- Caption: the given caption will appear in the visualization
- Value: this is the value that will be addressable in logical elements when the parameter is used
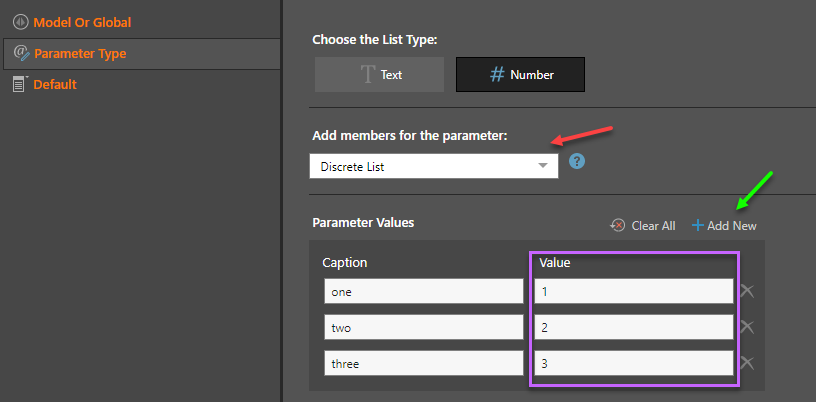
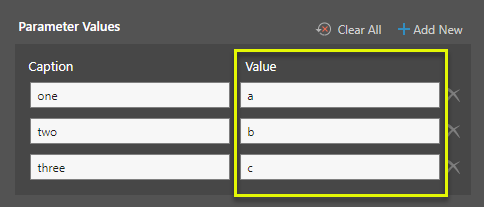
For "numeric" parameters, the value must be a valid number (purple box above). When the parameter is "text", the value can be any alphanumeric character,(yellow box below). For both types, the captions can be any alphanumeric characters.
Discrete Parameter Examples
One of the more powerful analytic features relates to using parameters inside formulas. Inclusion of parameters allows users to change the definitional construct of a formula at run time. Users can easily build formulas based on numeric parameters to perform what-if data analysis. For instance, a user may wish to project sales and net profit figures if their top 10 products were sold for double their current price.
Phase 1 - build the parameter
STEP 1
From Type, choose Number.

STEP 2
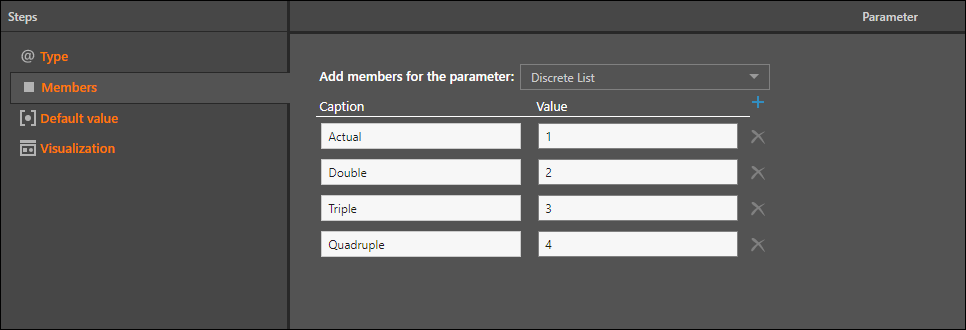
In Members, select the numeric values you want to apply to your global parameter. In Caption, add a name for each row. To follow this example, add the captions and values displayed in the image below:
STEP 3
In Default Value, select the value that will be applied by default when adding the parameter to a query. In this example, the actual value will be displayed by default:

STEP 4
In Visualization, select a slicer type, and then save your parameter.

Phase 2 - build the formula
STEP 5
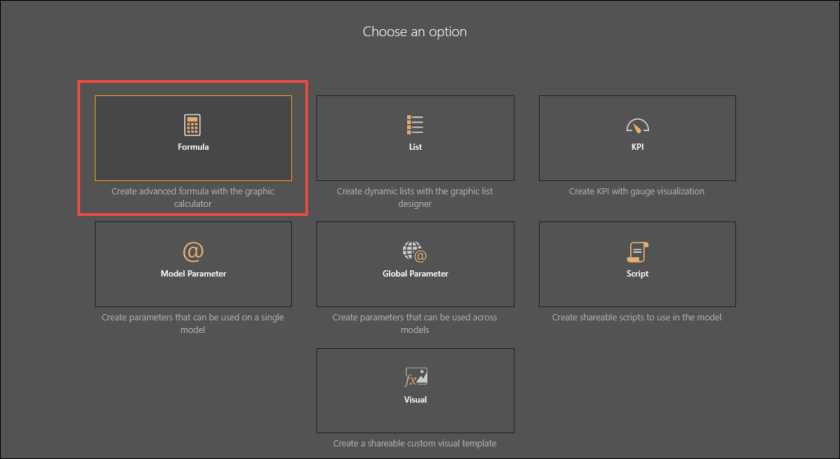
Open the Formula tool and select the server, database, and data model where you want the parameterized custom member to be located.
STEP 6
Add one of the elements nodes (Data Point, Member, or Set) to the canvas. In this example, the data point node was added, and the clothing element and sales measure were selected.
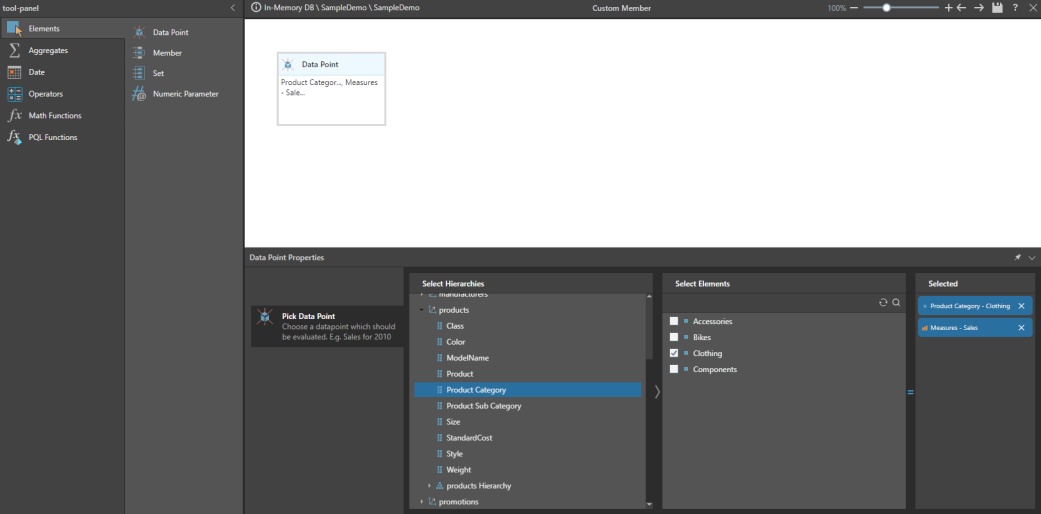
STEP 7
Add the Numeric Parameter node to the canvas, and find and select your parameter from the content tree.
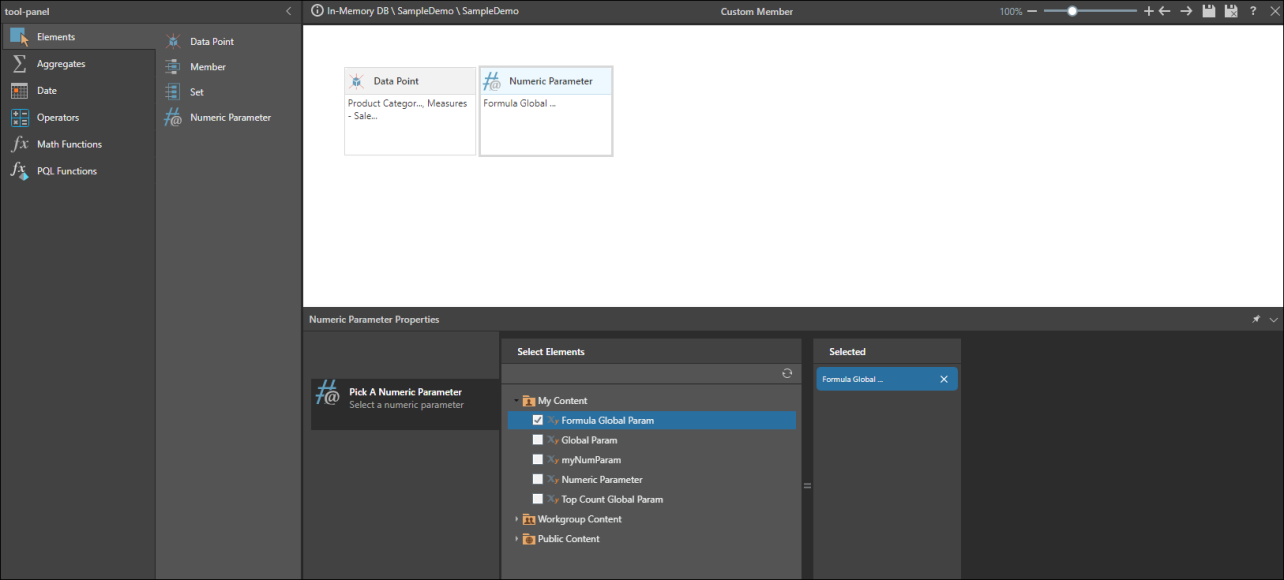
STEP 8
Add a calculation to your formula, and save.
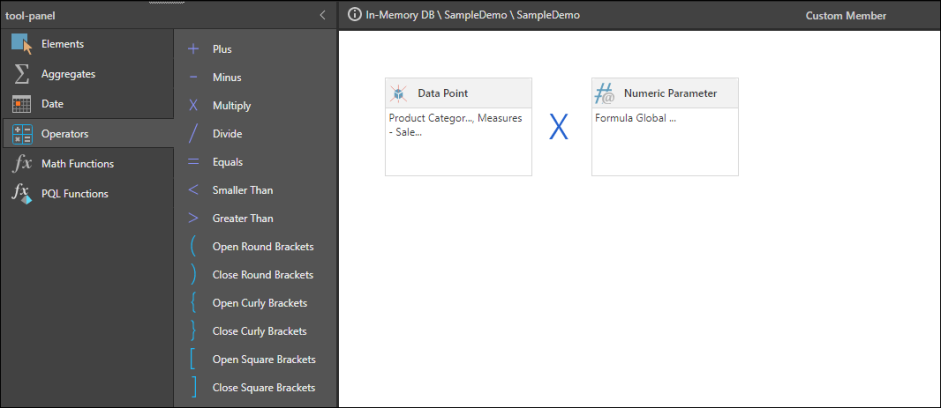
STEP 9
To open your formula in Discover right away, click Quick Discovery from the ribbon. Your formula will automatically be added to the drop zones.

The following example explains how to build a 'Top N' parameter, that will be used to inject the top n results into the query at runtime. First, a discrete list numeric parameter is built, and then injected into a custom list. The parameterized list is then used as a slicer in the query.
Phase 1 - build the parameter
STEP 1
Start by selecting Number.

In Members, select the numeric values you want to apply to your global parameter. In Caption, add a name for each row.

STEP 2
In Default Value, select the value that will be applied by default when adding the parameter to a query.

STEP 3
In Visualization, select a slicer type, and then save your parameter.

Phase 2- build the list
STEP 4
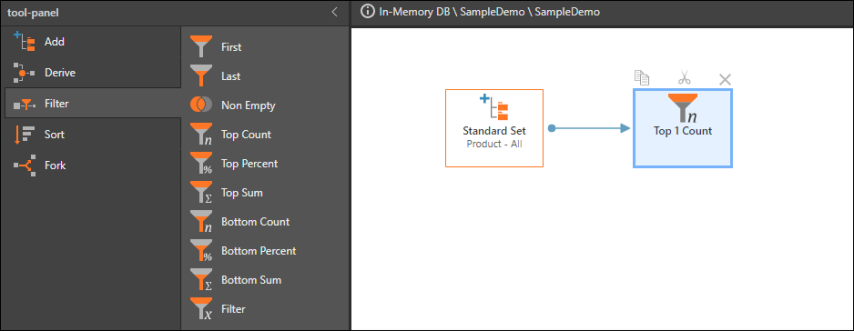
Open the List tool and the select server, database, and data model you want to add the custom set or member to (if building a . In this example, a custom set was built in Lists. First the Standard Set node was added, and all the elements within the Product hierarchy were selected.
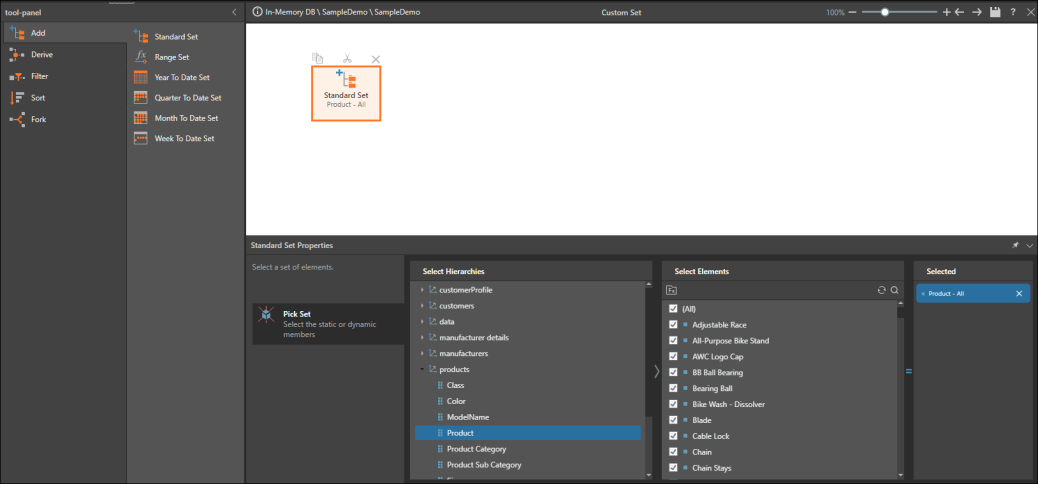
STEP 5
Add a filter node. In this example, the Top Count node is added.
STEP 6
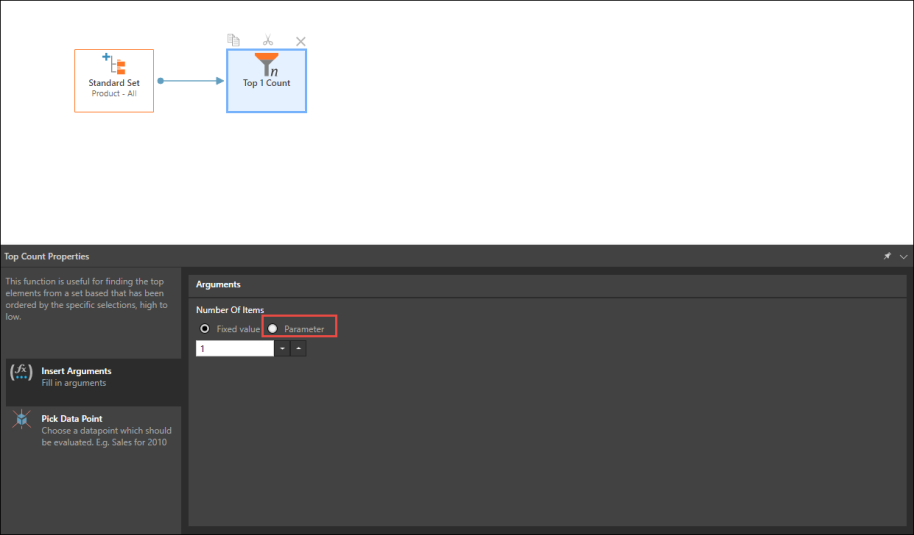
Under Arguments, select the Parameter option.
STEP 7
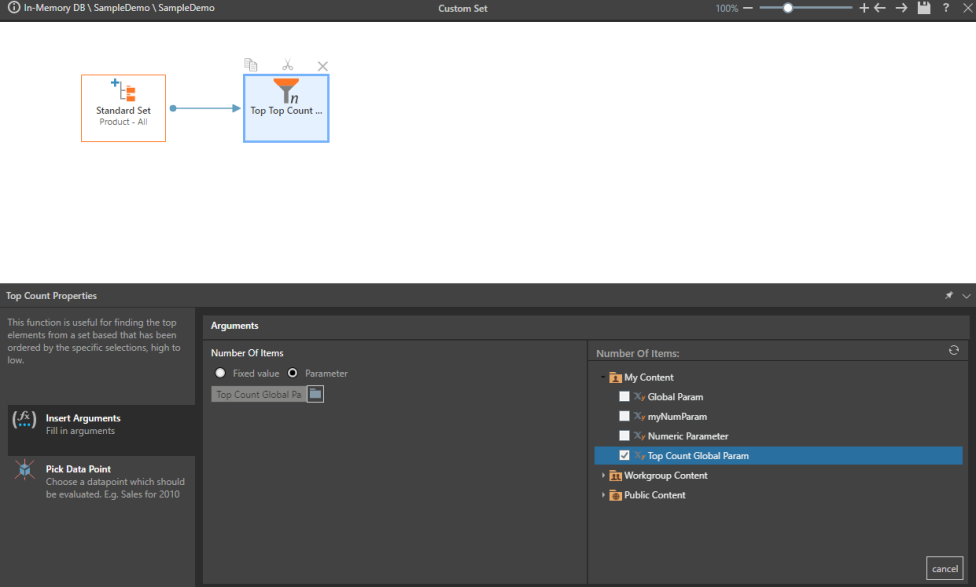
The content tree will appear - select your parameter.
STEP 8
Save your list and open Discover. To open your parameter in Discover right away, click Quick Discover in the ribbon. The parameter will automatically be added to the drop zones.
